Physical Computing
For this workshop, you'll need to download the Arduino IDE. Then peruse these Adafruit instructions for using a photocell to take analog light measurements, which are then expressed via your machine's serial monitor.
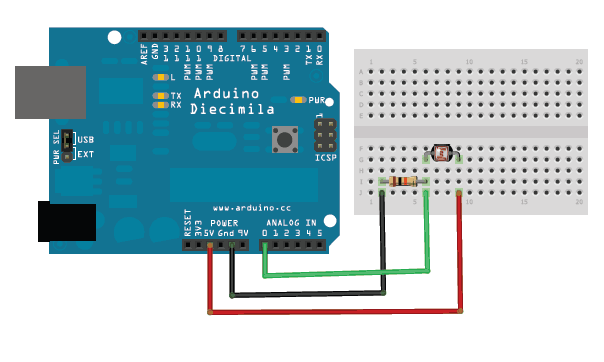
Here's a breadboard view of the simple circuit we'll build (using an Uno):

And (care of Adafruit), here's the sketch we'll use (which, line by line, I'll walk you through):
/* Photocell simple testing sketch.

Connect one end of the photocell to 5V, the other end to Analog 0.
Then connect one end of a 10K resistor from Analog 0 to ground

For more information see http://learn.adafruit.com/photocells */

int photocellPin = 0;     // the cell and 10K pulldown are connected to a0
int photocellReading;     // the analog reading from the analog resistor divider

void setup(void) {
  // We'll send debugging information via the Serial monitor
  Serial.begin(9600);
}

void loop(void) {
  photocellReading = analogRead(photocellPin);

  Serial.print("Analog reading = ");
  Serial.print(photocellReading);     // the raw analog reading

  // We'll have a few threshholds, qualitatively determined
  if (photocellReading < 10) {
    Serial.println(" - Dark");
  } else if (photocellReading < 200) {
    Serial.println(" - Dim");
  } else if (photocellReading < 500) {
    Serial.println(" - Light");
  } else if (photocellReading < 800) {
    Serial.println(" - Bright");
  } else {
    Serial.println(" - Very bright");
  }
  delay(1000);
}